
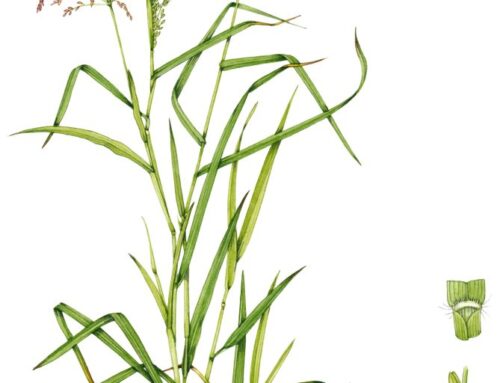
This blog shows how to ink up the Downy Birch leaves and catkins, Betula pubescens. It accompanies a Youtube film which you can watch, to fill in the details.
Starting out
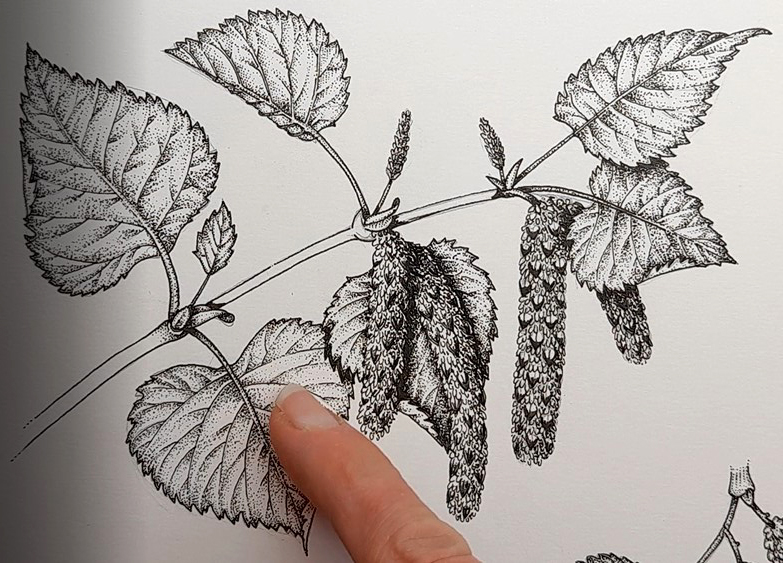
Begin with a decent pencil illustration of your subject. No need for any shading or tonal detail, but an accurate line pencil drawing is required.
I use a Pentel P205 mechanical pencil for this, with an H or HB lead. The paper I draw onto is Daler Rowney Heavyweight cartridge, which works well for pencil and for ink. Pens are Unipin, and I have them with an 0.05, 0.1, 0.2. and 0.5mm width nibs.
Using the 0.1 or 0.2 nib pen, literally go over the pencil lines with ink. Where the lines are less heavy (such as on the end of a leaf vein) break up the line into dots or smaller lines. This allows the eye to accept that part of the image is “fading out”.
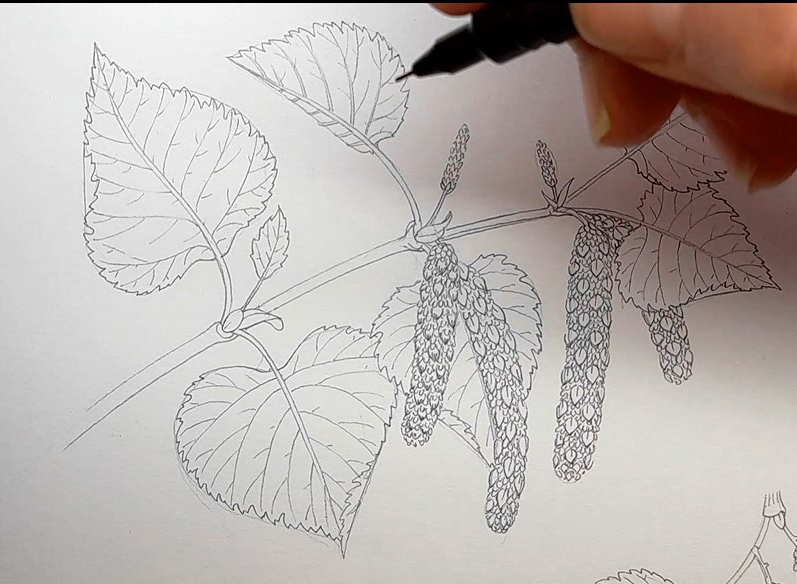
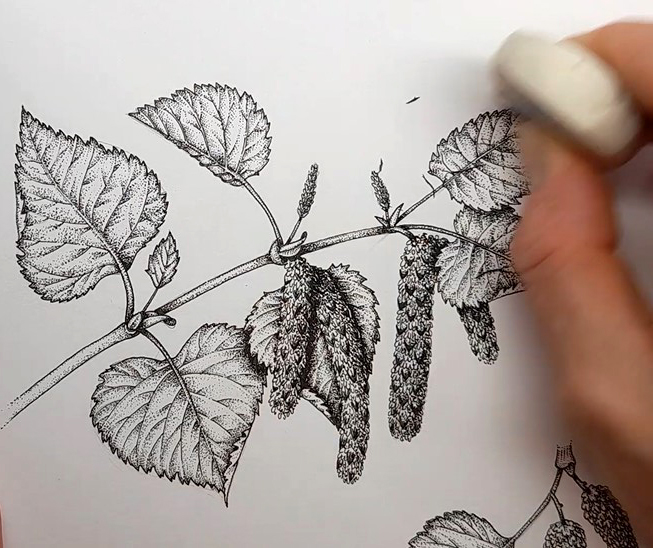
Pencil drawing of the Downy birch with pen poised for action
Pen lines: How much detail?
When you’re doing this, you don’t want to be thinking about lights and darks yet. Just shape. Sometimes, the nature of what you’re drawing will mean areas appear darker. You can see this with the catkin below. because there’s lots of detail, the catkin looks darker.
You can choose how much detail you add to any drawing. Certainly at this stage, you don’t want to overcomplicate the picture. The white areas of paper are important, you want to be sure you don’t swallow them up. It’s quite a personal choice when it comes to the amount of detail you put into leaf veins, I tend to draw the lines til my eye sees them dissolve into the blade of the leaf. At that point I fade the line out into white with little dots, increasingly small and increasingly far apart.
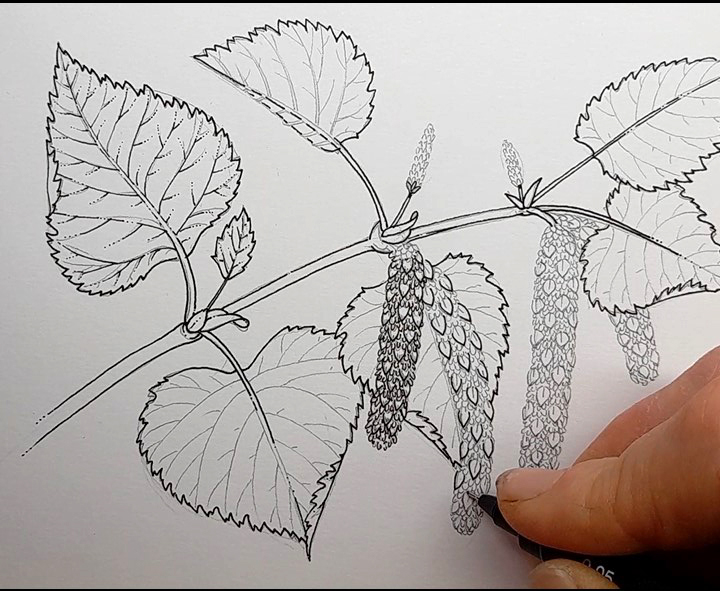
Drawing pen lines on top of the pencil lines
Adding shadow
Once you’ve done the lines, you want to add shadow. you also want to break up the stark solidity of the line. You can do this by stippling. Stippling is using loads of tiny dots to represent shadow and tone. In general, the larger the dots and closer together they are, the darker the shadow is. Less pressure means each dot will be smaller.
You need to look really closely at your leaf to see where the shadows lie. In general, the tradition in botanical illustration is to have a light source coming over your left shoulder. This informs the position of the shadows. Of course, you can change this light source, but do be certain you’re consistent so that the shadows make sense.
Another thing to remember is that if a shadow is cast below a leaf vein (as below), then it’s likely that every vein on that side of the leaf will cast a similar shadow – below the vein. Look at leaves, often if the shadow is cast below the lateral veins on one side of the midrib, the pattern will be flipped on the other side.
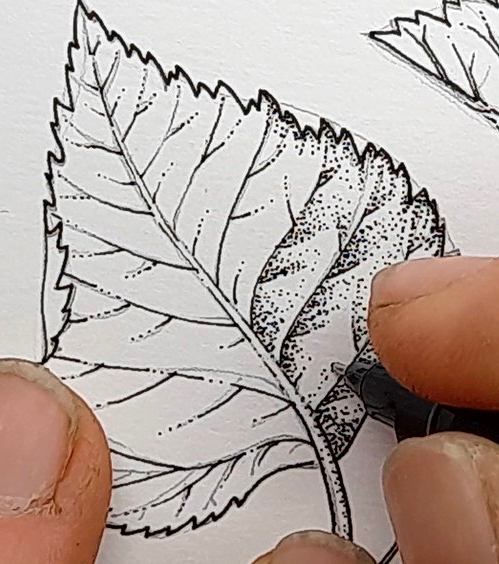
Stippling the shadow below the leaf veins
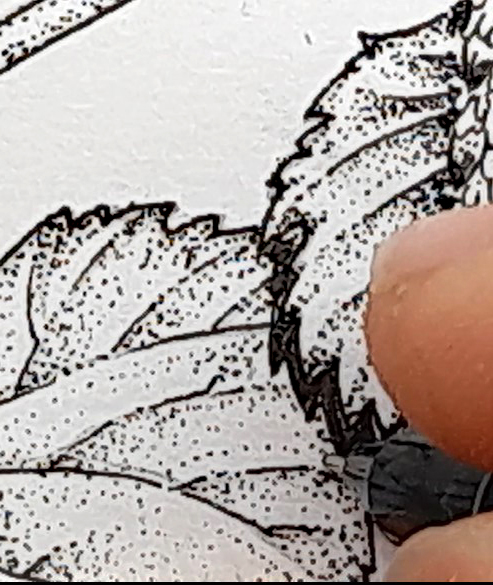
Softening the edges
The eye likes things to have edges, and our stark pen lines have provided this. however, the eye also relishes a gentle transition from a dark line to a white area of paper. Stippling from the edges inwards provides this. More dots right up to the pen line, less and smaller dots as you move in and away from that edge.
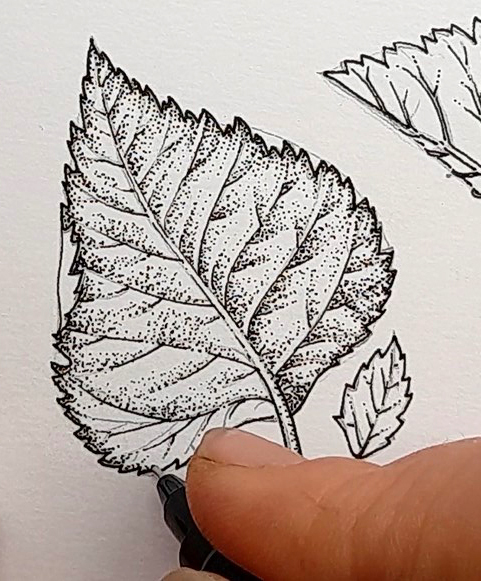
Darkening the edge of the leaf
Shadows
As well as smaller shadows cast by the leaf veins, or the edge of a stem, you have larger and darker areas of shadow. In the Downy birch, the second leaf on the bottom casts a dark shadow on the first one. Shadows are always cast by something, so you need to keep an eye on the logic of the tonality in any illustration
How do you show this?
Well, start by blocking in the area of shadow. Use a thicker ink pen for this, with an 0.5 nib. Colour in the darkest part of the shadow, making it solid. Make sure you look closely at the subject to figure out the shape of this shadows. You can see this shape below.
Leaves completed, working on dark shadow
Stems
For some reason best known to myself, instead of working into the dark shadows, I decided to sort out the leaf stem at this point. It’s easy. Using the same approach as before, soften the top edge of the stem with a line of small dots. To suggest shadow on the underside of the stem, do two or three lines of dots on the bottom line of the stem. You’ll also want to darken the areas around the nodes.
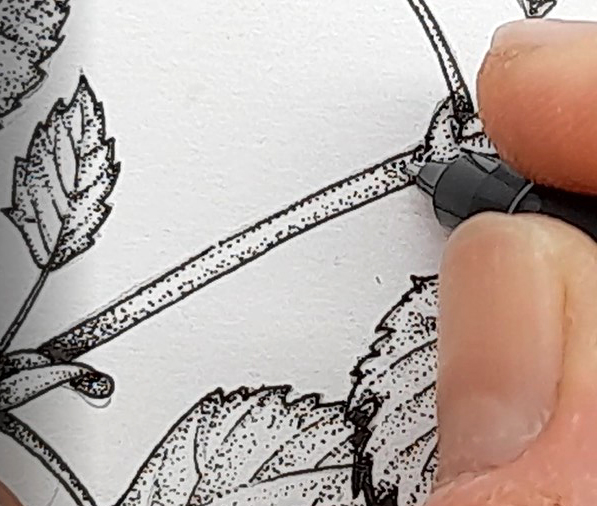
Stippling the stem
Softening the shadow
Now we need to make that dark shadow less stark. Again, use lots of dots to ease out the crisp shadow edge a little. You want the eye to register the area as dark shadow, but not to feel a jarring at how suddenly it ends, and moves onto the white of the paper. Soften it with stippling. This can take some doing as you are almost building a solid black on the very edge of the dark area. As you may well have noticed by now, stippling takes AGES!
Working to soften the edges of the dark shadow
Downy birch catkins
I struggled a little with the catkins. I understood the structure, and had figured out details of individual scales and flowers. But representing this on the illustration was hard. it was another of those challenges relating to scale. Having large things (like a leaf or a tall plant) with tiny elements (such as teeny flowers or scales) on the same image is challenging. the worst for this is Cow parsley and relatives. Enormous plants, with miniscule individual white flowers, and intricately divided leaves.
Working into the shadow of these catkins was tough too. I needed the right hand side of each cylinder to be in shade, to be darker. but I didn’t want to lose the detail under a blanket of stippling. The catkins also cast drop shadows on the leaf behind. This meant the very edge of the catkin, on the right, had to be left white (or pale) so it showed up.
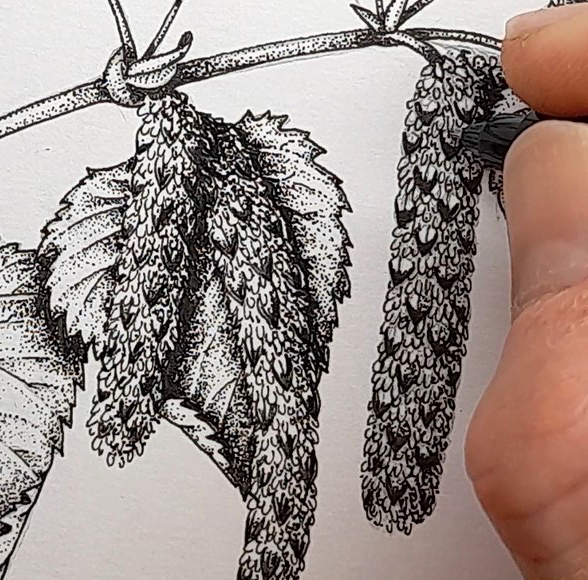
Working into the catkins
Rubbing out
Once the stippling is all done, it’s time to rub out the pencil lines. I use a soft rubber, a Factis triangular, for this. it can lift a tiny bit of the darkness of the ink, so use a light touch. It can also leave the texture of the page feeling a little sticky. But it does the job.
Looking at a completed illustration with the pencil removed always feels great. It’s the last step it what is often a painfully long-winded process.
Rubbing out the pencil lines
Adding things you may have forgotten!
Just because you’ve finished, doesn’t mean you can’t return to the illustration and add things. In this case, it was only the next day that I realised I’d not added the species specific tiny hairs to the stem of the Downy birch.
Not a problem. Using my thinnest pen (0.05mm) I just popped them in along the length of the plant.
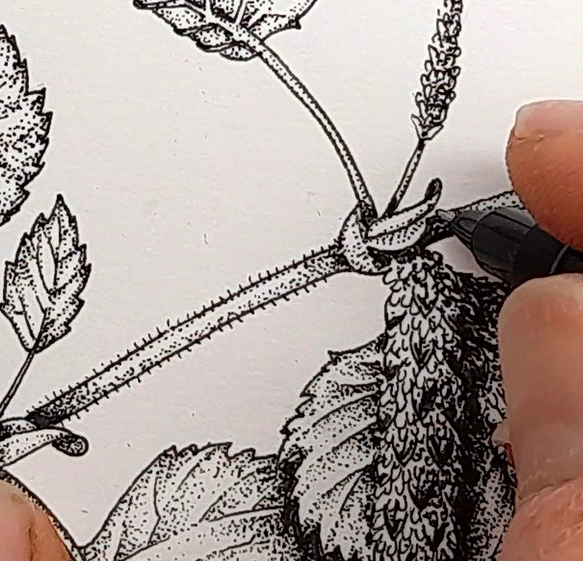
Adding hairs to the stem
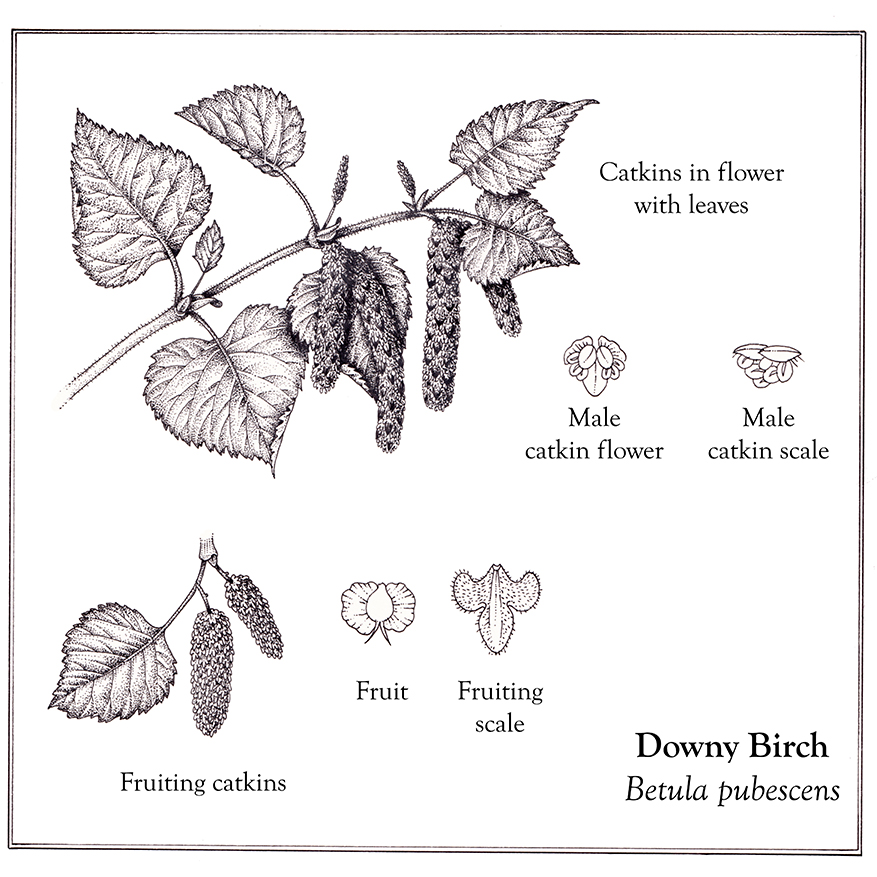
Completed Downy birch illustration
And that’s the Downy birch leaves and catkins completed. I also did some details of individual catkin scales, flowers, and fruits.
Then I handed over the illustration to the design team at Jonathan Cape, so they could prepare the illustration for inclusion in The Tree Line: The Last Forest and the Future of Life on Earth by Ben Rawlence.

Completed pen and ink illustration
I believe they’ll be adding borders round the different illustrations, and one of the mock-ups looks a little like the image below.
I can’t wait to get my hands on the book. It sounds like a timely and fascinating topic. Looking at the trees growing on the edge of the arctic circle and seeing how they have been affected by climate change. For fifty years they tree line has been creeping closer to the north pole, and Ben looks at what this means both for this northern biome and for the planet, and ultimately for us as well.
Below is a real-time film of me completing this illustration, along with me explaining the process and nattering away.
The post Step by step Downy Birch leaves appeared first on Lizzie Harper.