
The Living Wisdom of Trees: Commission
In the summer, I completed lots of pen and ink illustrations of trees and their details for “The Living Wisdom of Trees” by Fred Hageneder.
The commission involved illustrating fully grown trees, along with details specific to each species such as blossom, leaves, or fruit. I’ve written a blog on how I went about illustrating the trees; this one is on the details.
Gathering Reference
First step in any illustration commission is to gather your reference. For the native British trees this was easy. Not only do I have a stash of things like Ash tree keys, acorns, and pine cones; but I also have my botanical sketchbooks to refer to.
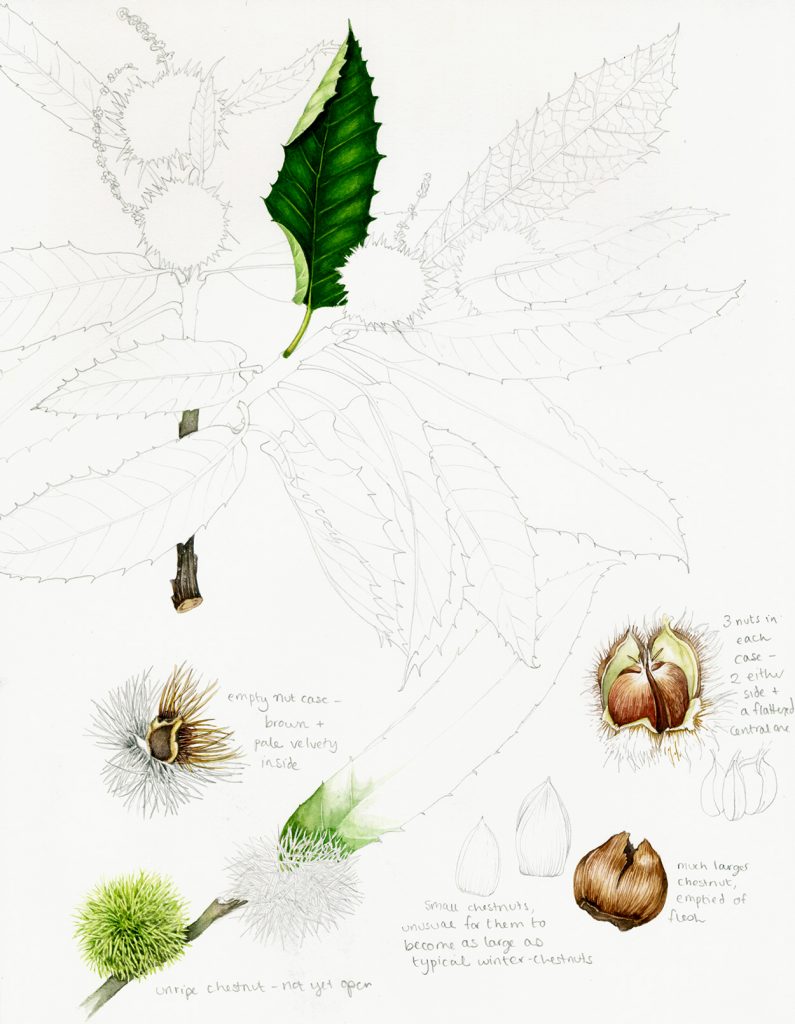
Sweet chestnut sketchbook study
For the more exotic species this was harder, and involved a lot of trawling about on the internet.
Drawing up pencil roughs
I like mechanical pencils like the Pentel P205 (0.3mm lead) and draw onto decent quality cartridge. It’s important to work onto a cartridge which can take rubbing out. This is because I draw the ink final on top of the pencil rough, then rub out the guide lines.
The variety of things to draw for this commission was a treat. The art director at Watkins Publishing let me decide what details to illustrate for each species which gave me enormous freedom.
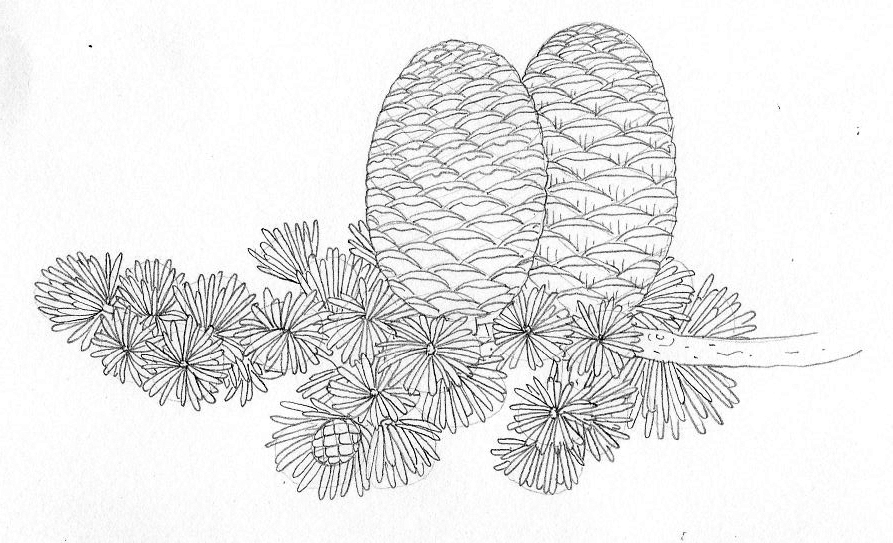
Obviously, for conifers pine cones are a must.
Cedar of Lebanon Cedrus libani
For some species, I stuck closely to my sketchbook reference.
Sweet chestnut Castanea sativa pencil rough
As I own copyright on most of my illustrations, it was easy to go back and use images from Foraging with Kids by Adele Nozedar (also published by Watkins) for reference.
Other species had incredible and exotic blossoms that just HAD to be illustrated; the Baobab is a good example.
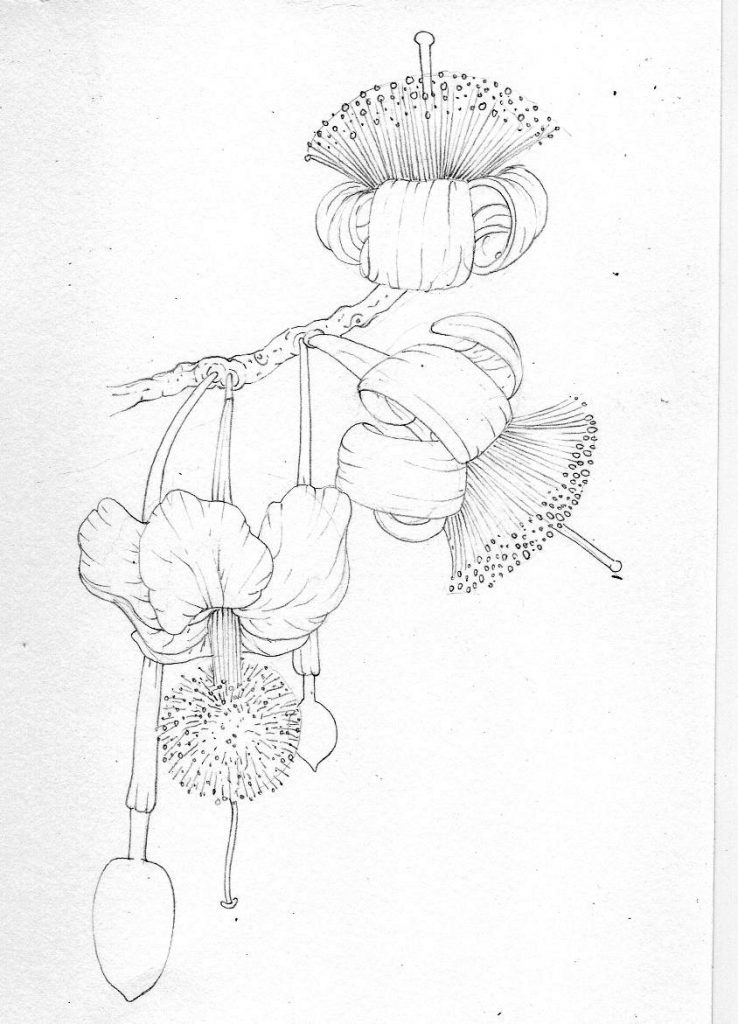
Baobab Adansonia grandidieri pencil rough of flowers and fruit
I was fortunate and the art director approved all but one of my pencil roughs (I needed to re-draw a sprig of Tamarisk, and as luck would have it, it had just come into flower in a neighbour’s garden.)
Pen and Ink Finals
I totally loved working on these finals, perhaps because they were so much easier than the larger trees.
The approach is the same in all cases. One thicker line for the outlines, then details and stippling with smaller nibs. I used Unipin fine liners https://uniball.co.uk/brand/uni-pin/ with 0.2, 0.1, and 0.05mm nibs. Over the course of this project I must have got through about 5 of the thicker pens and about 15 of the tinier ones. Their nibs get blunted by use, but I haven’t got the discipline to use Rotoring pens which don’t degrade in a similar way.
I’ve arbitrarily divided the illustrations into sections; fruits, flowers, cones, catkins, leaves, and …spiny things.
Pen and ink Fruits
These were heavenly. You don’t need a lot of tonality to suggest a ripe fruit, just a little stippling round the edges and to give texture.
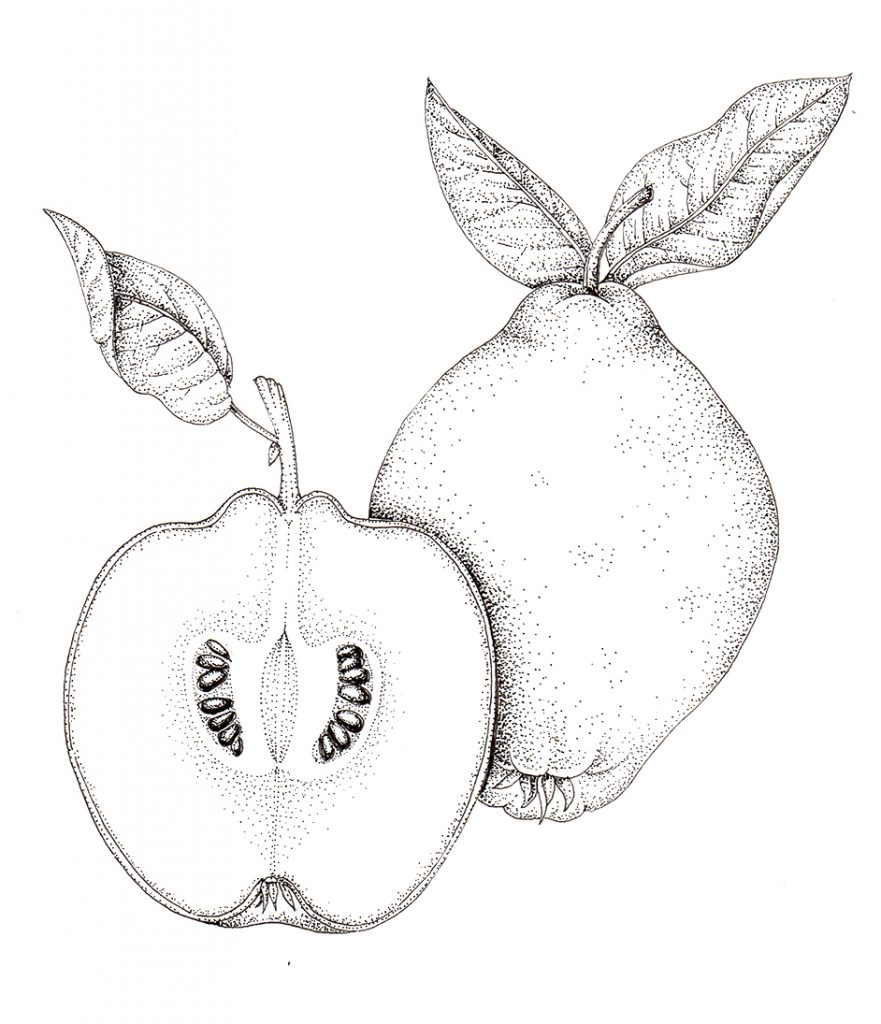
Quince Cydonia oblonga
Sometimes the texture of the fruit does most of the work for you; once you’ve added the pith and striations to the inside of an orange, you don’t need to do very much else to it.
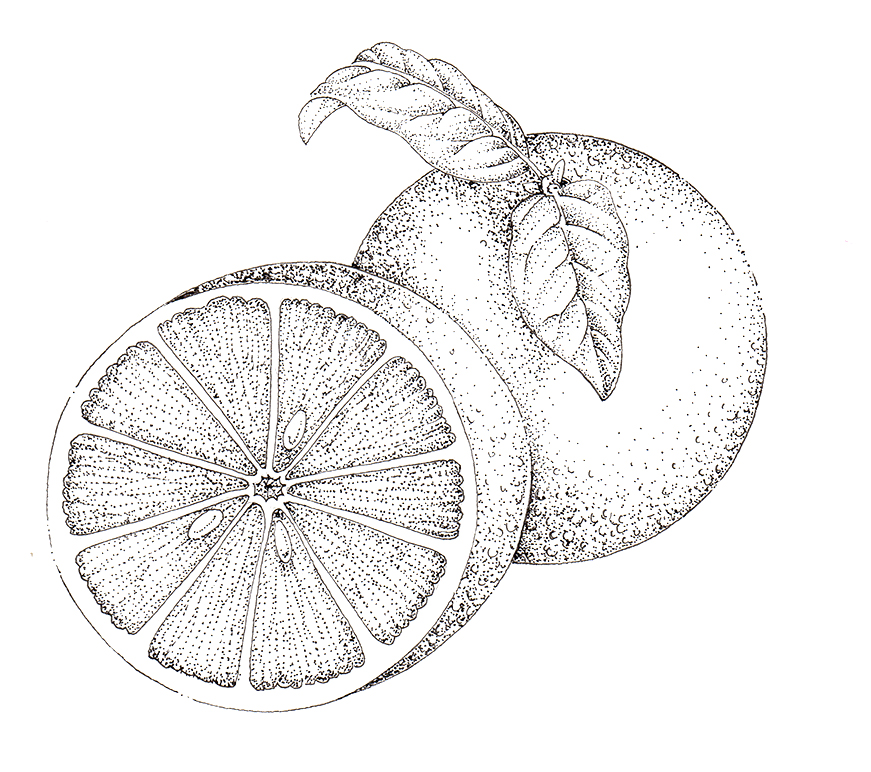
Orange Citrus sinensis
I particularly liked it if there was a sharp contrast between lights and darks, as with this sliced Pomegranate.

Pomegranate Punica granatum
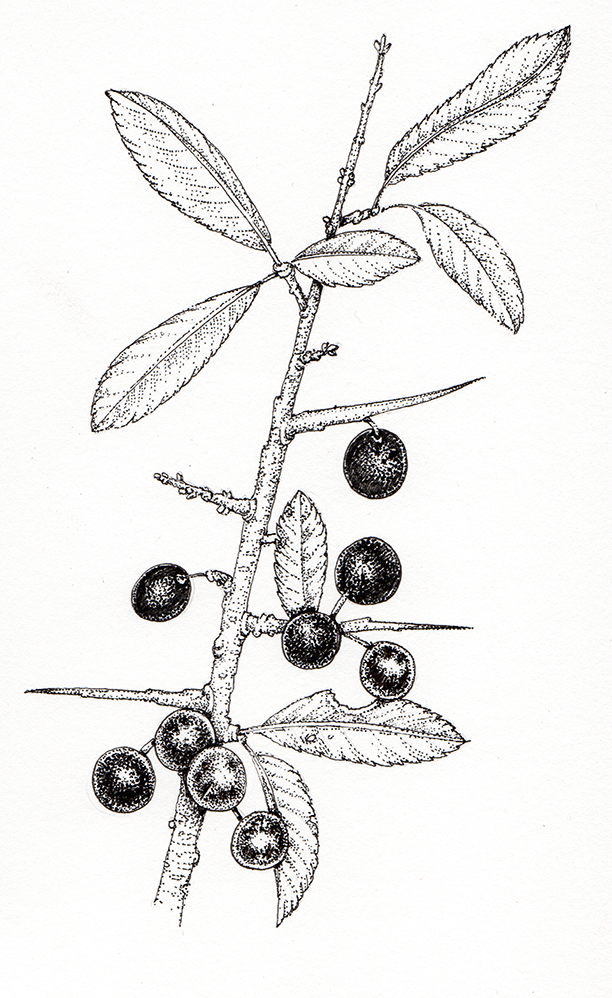
Some fruits and berries are dark, and in these cases I tried to capture that.
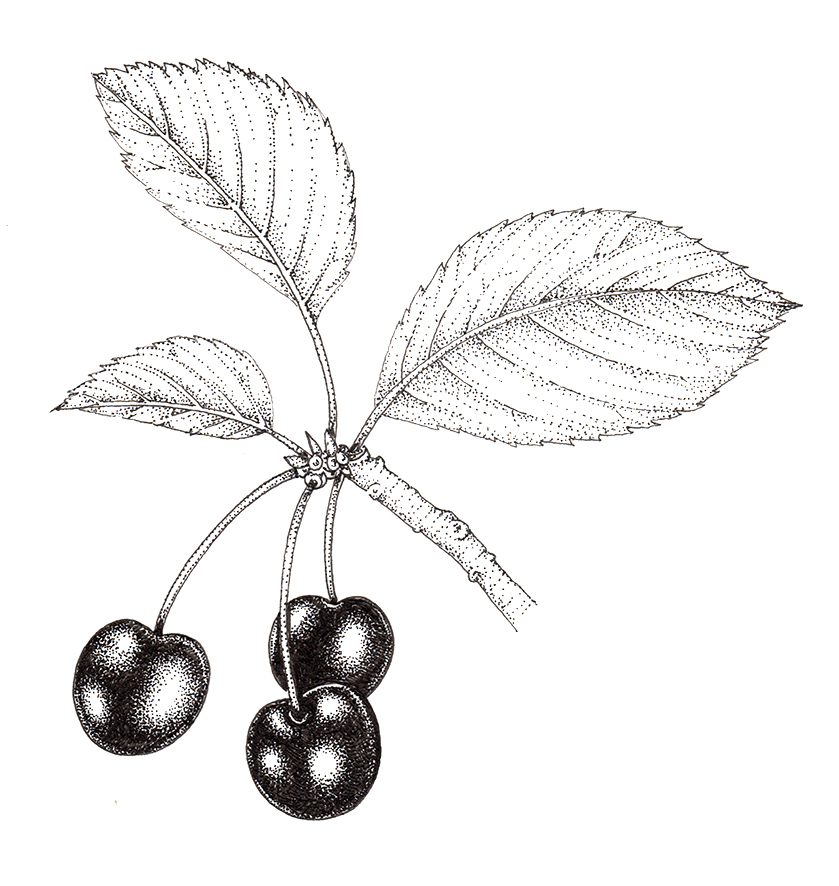
Cherry Prunus avium
It was a simple technique; colour in the outside area of the fruit solid black, then stipple carefully around the highlight. Easy.
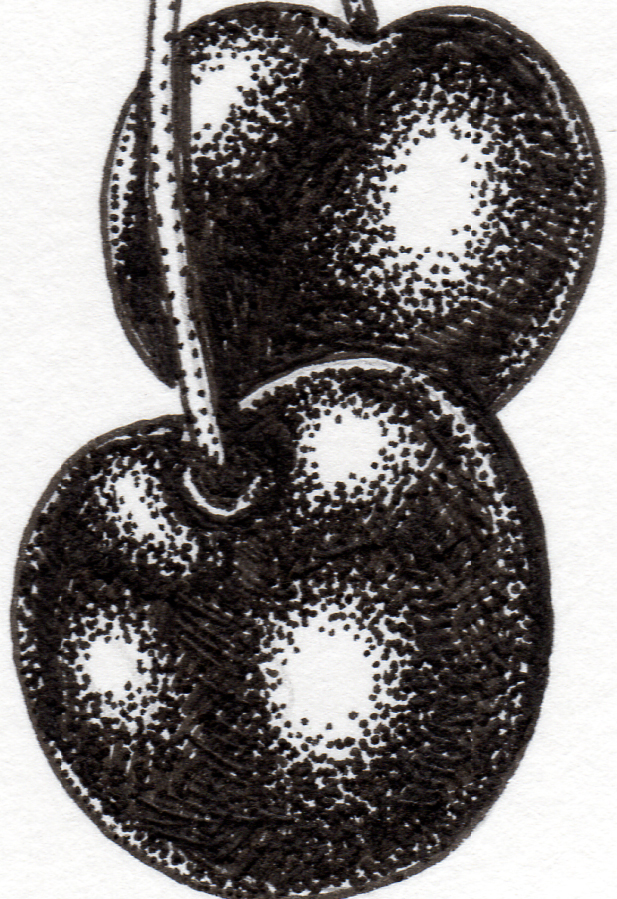
Cherry Prunus avium detail
Pen and ink Flowers
The trick with flowers is to keep them as light as possible, especially if the petals are pale. A very few tiny dots give a great deal of information. It’s easy to add too much stippling too fast and end up with a heavy and dull petal.
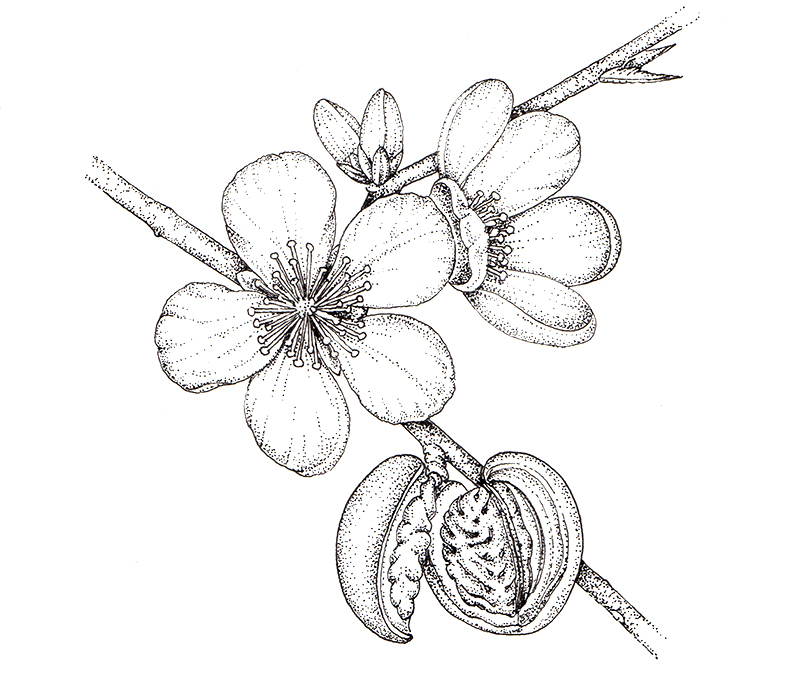
Almond Prunus dulcis blossom
Sometimes the flowers were new to me, as with this Eucalyptus. I’ve never seen this blossom in the flesh, which confers its own challenges.
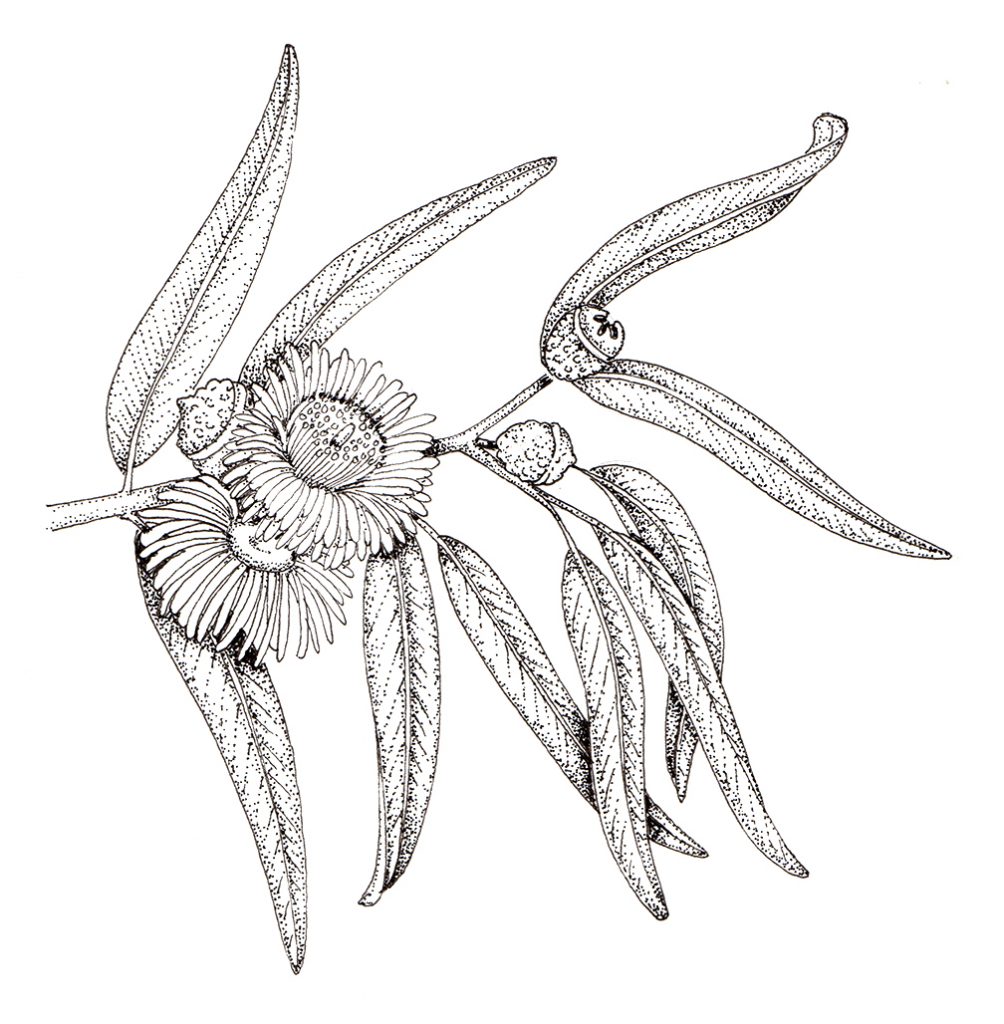
Eucalyptus Eucalyptus globulus
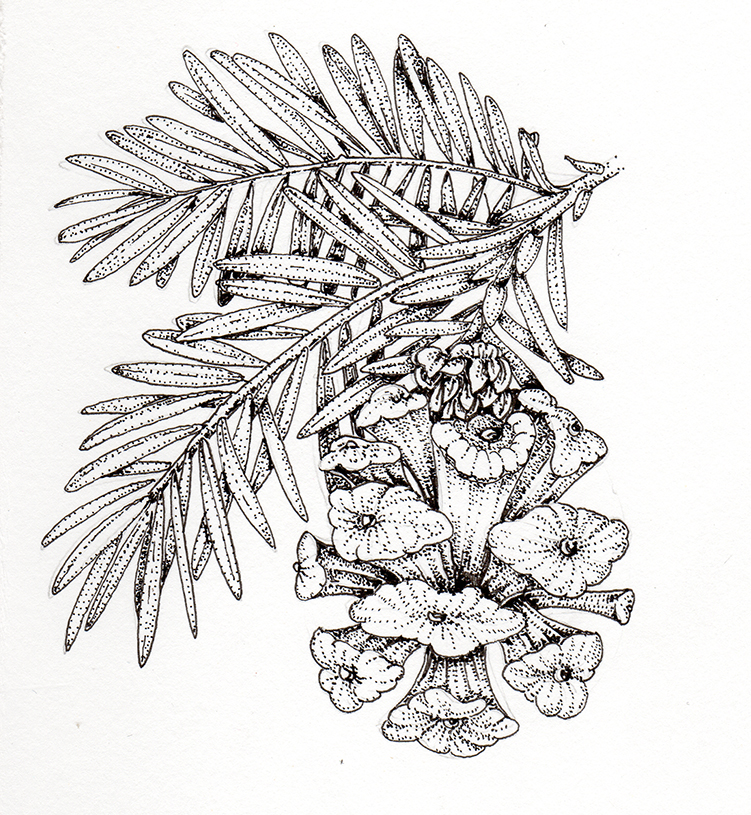
Other times, the flower was just ridiculous and super-exotic. The blossom of the Pipal or Sacred Fig tree is wild. Not only does it look amazing, but it’s scarlet, magenta, and yellow. I can’t show that in a pen and ink illustration, but I certainly enjoyed the exuberance of the structure.
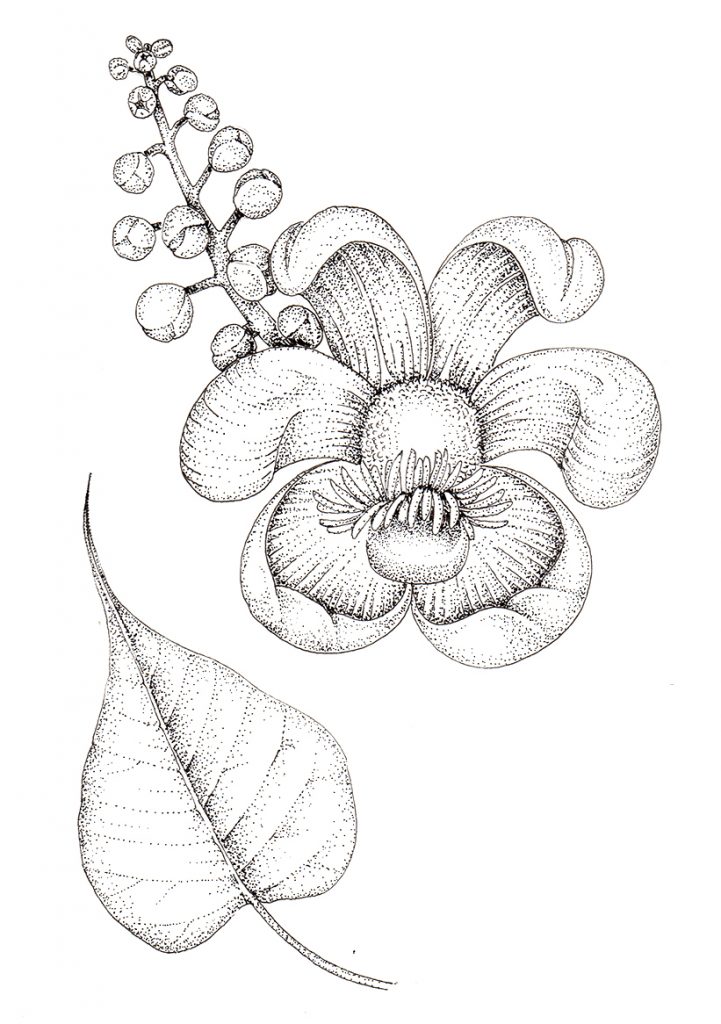
Sacred Fig Ficus religiosa
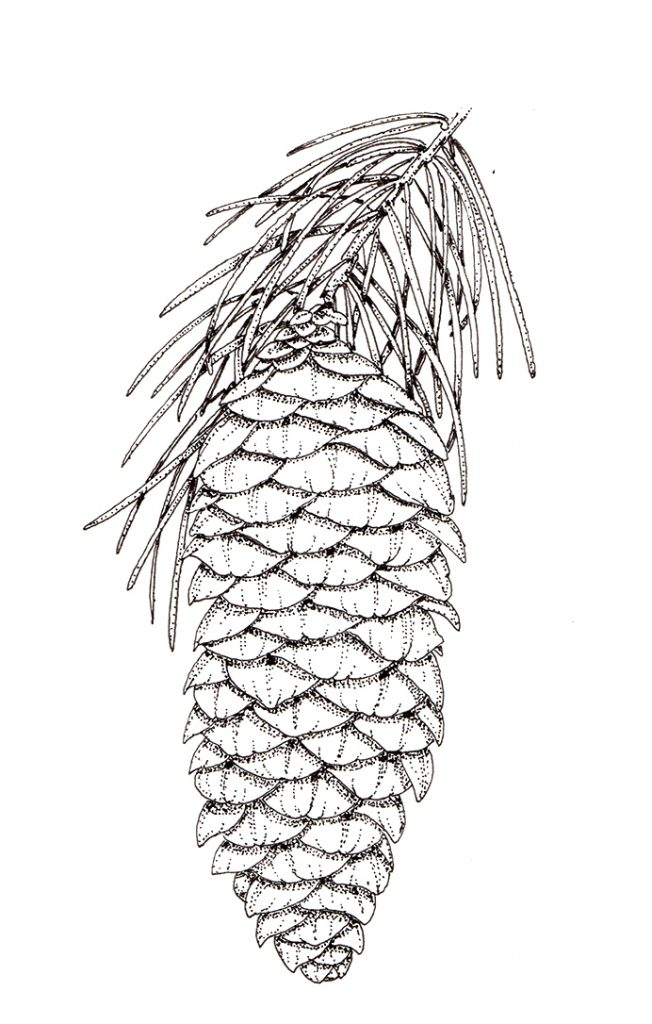
Pen and ink cones
With pine cones, it’s all about the geometry. If you get the Fibonacci spiral right, it’s just a matter of being consistent with your shadows and light source. Treat each individual cone scale in the same manner, and you’ll get a consistent looking image.
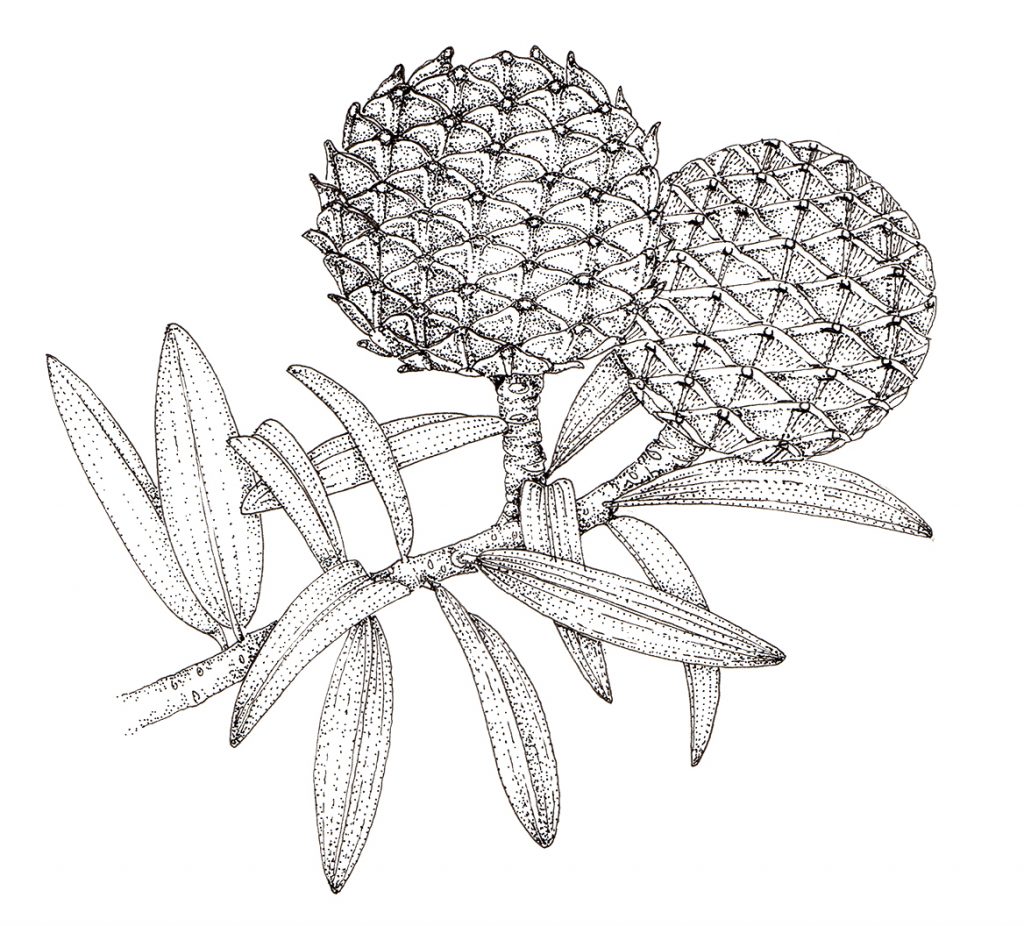
Kauri Agathis australis cones
I tend to add more depth to the shadows on the right bottom corner; this comes from a convention in botanical illustration that suggests your light source generally comes from top left. Old habits die hard. With pine cones you need to shake this up a bit, often your darkest shadows line deep within the pine cone.
Giant redwood Sequoia sempevirnes cone
I love that within the world of pine cones there’s such an extraordinary variety of shape and texture.
West Himalayan Spruce Picea smithiana cone
Pen and ink Catkins
I’ll admit to not loving drawing catkins. There’s an enormous amount of detail, and it’s crammed into a tiny elongated shape. When the catkins mature into fruit, you have a similar challenge.
The Cottonwood was especially tricky as the flowers and residual pappas round the fruit are very fluffy and light, so need a truly light touch.
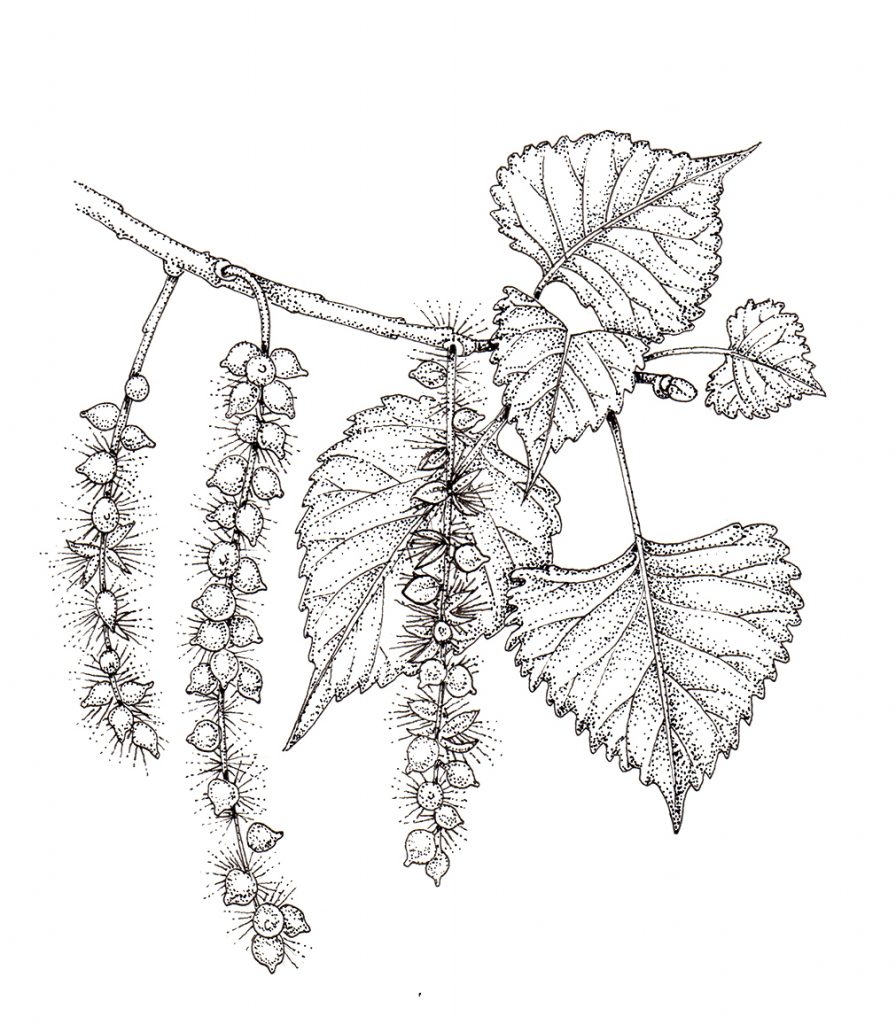
Cottonwood Populus deltoids
Some catkins are easier, like the alder. I love Alder trees and their compact little woody cones, so drawing them is never a bore.
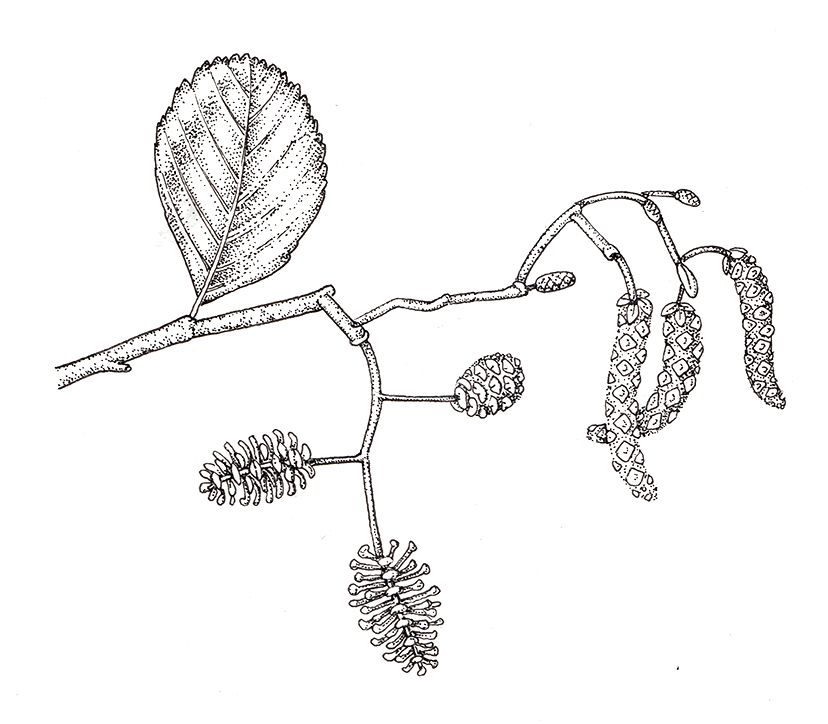
Alder Alnus glutinosa catkins and cones
Pen and ink Leaves
Occasionally, one of the tree species didn’t throw up an instant suggestion of fruit or flowers. Sometimes I was simply too lazy to tackle the flower or catkin, and chose instead to simply provide a sprig of leaves which summed up the tree.
Drawing a pen and ink leaf involves getting the venation right, leaf margins accurate, then using graduated stippling to add shadow and texture.
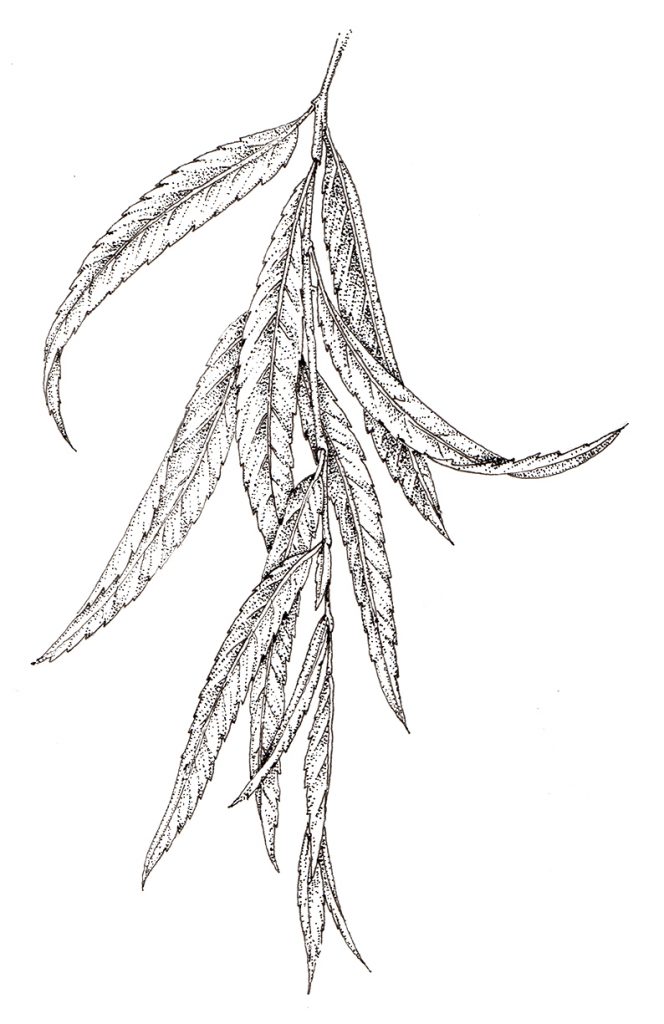
Weeping Willow Salix babylonica leaves
In some cases, the fruit isn’t instantly recognisable and the leaves are. It’s a no-brainer to choose the leaves, as in the case of the distinctive Ginko.
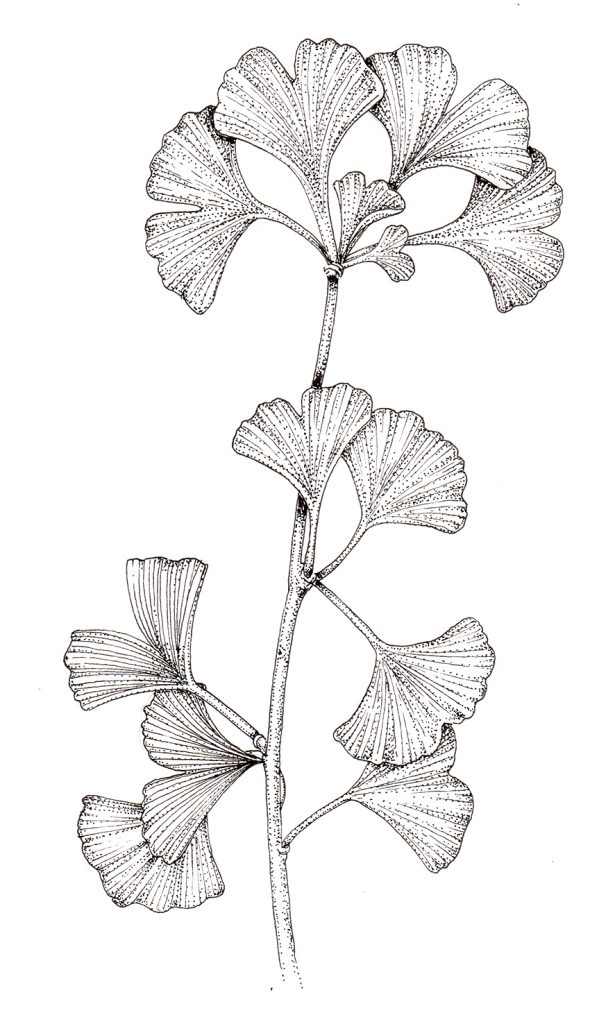
Ginko Ginko biloba leaves on branch
Pen and ink and spiky things
I am aware that “spiky things” is a dubious botanical term, but all the thorns and spikes need a similar illustrative approach.
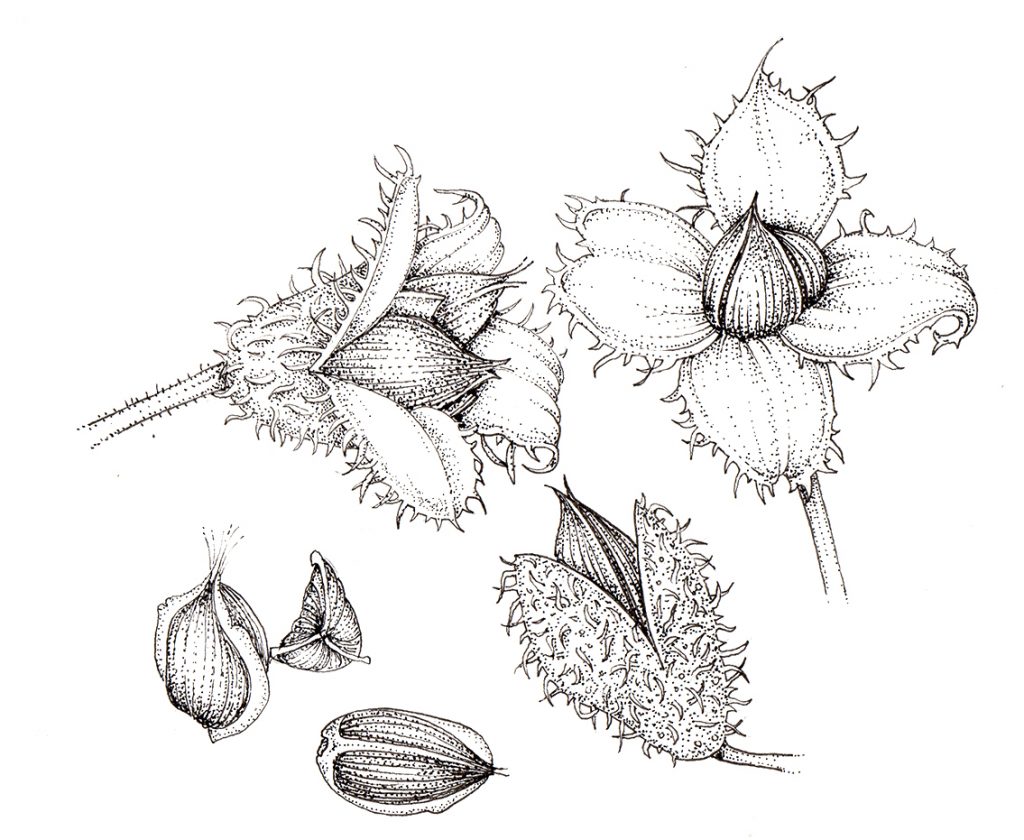
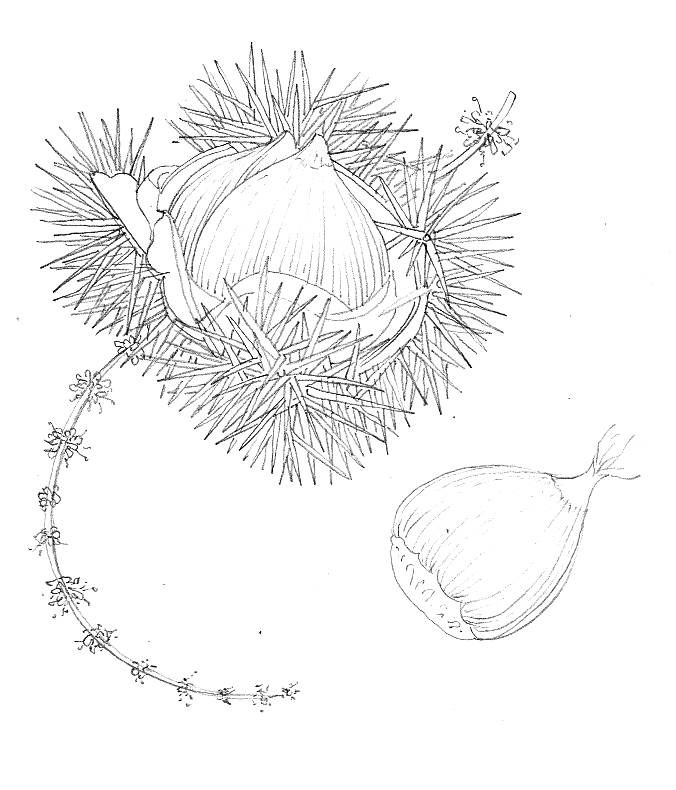
Beech Fagus sylvatica beech nuts cases
I draw all the spines on, changing the line to a broken line and then a couple of dots where it joins the main fruit. With shadows, try to keep your light source consistent. Remember that spiky things pointing straight at you look like dots with a circle below.
Here’s the final of the Sweet chestnut rough.
Sweet chestnut Castanea sativa chestnut flowers and nuts in spiky seed case
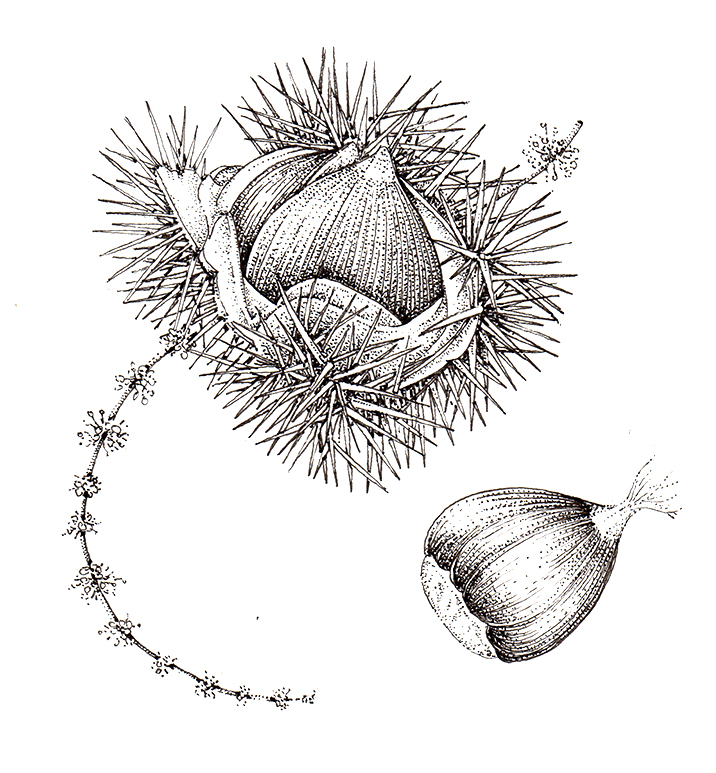
This conker was probably the toughest illustration in the book, but I absolutely loved taking it on. I did the seed case first as there was a high chance of messing it up. There’s so much geometry to consider when you do botanical illustration! Once completed, getting the glossy texture of the conkers was a breeze and a joy.
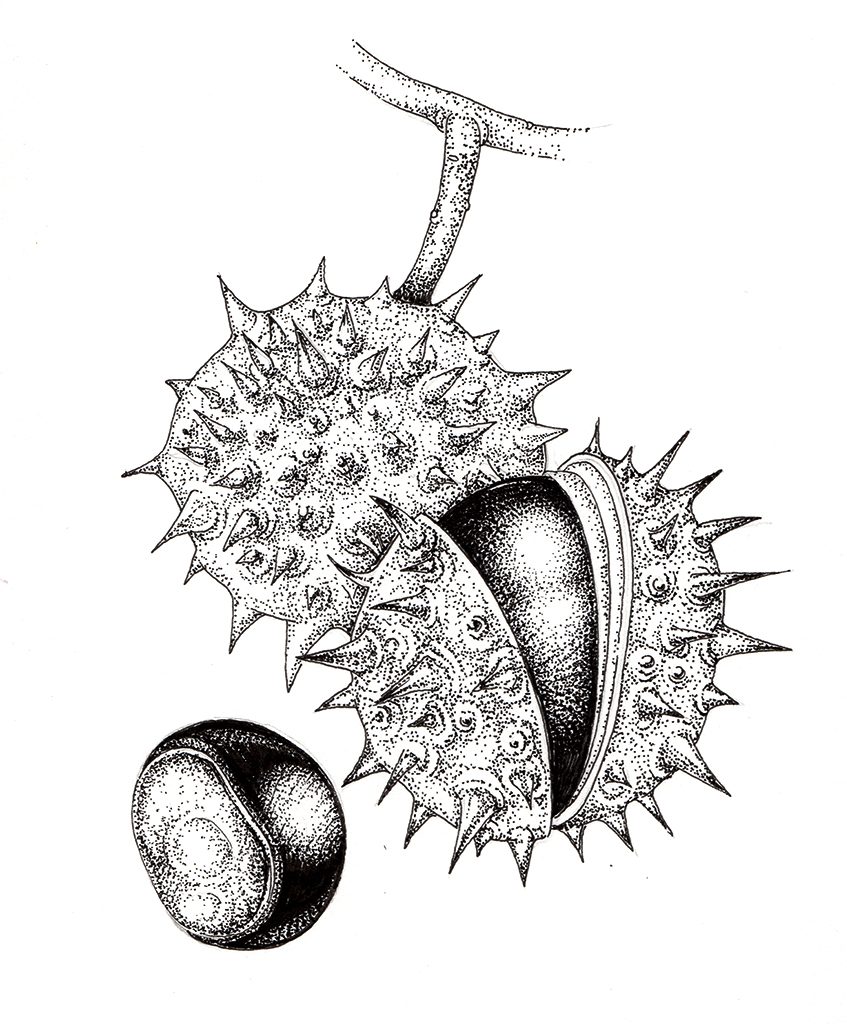
Horse chestnut Aesculus hippocastanum conker and spiked fruit
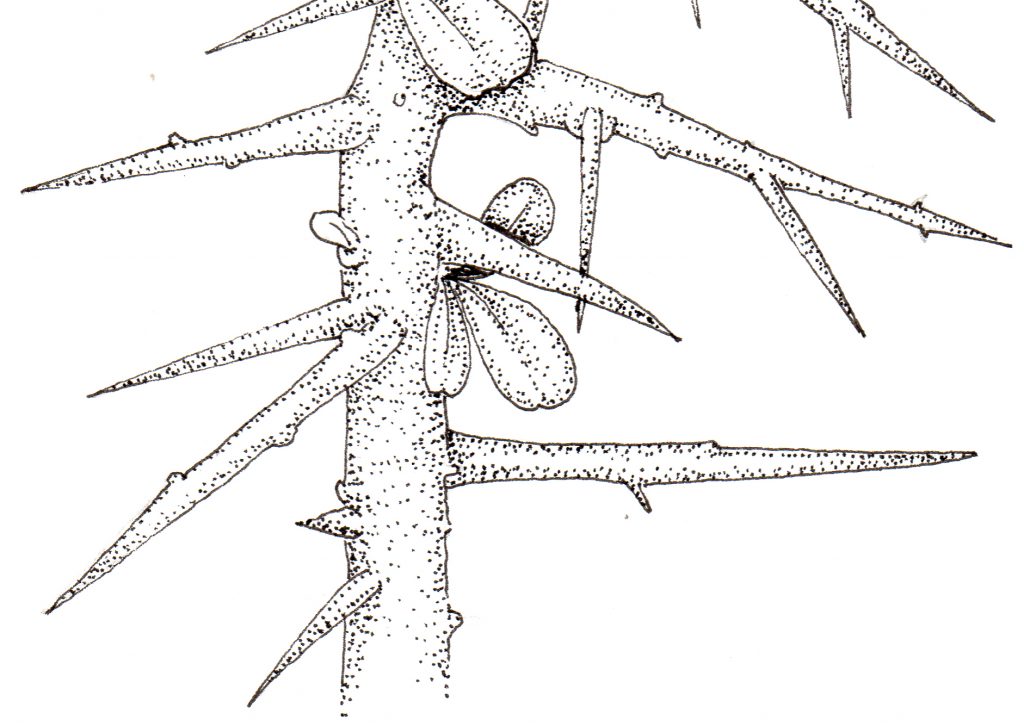
Spines also appear on branches and trunks of trees. Again, keep the shadow consistent and a light touch at the tip of a spine makes it look sharp.
Blackthorn Prunus spinosa branch with thorns
Here’s a close up of the Myrrh tree.
Myrrh Commiphora myrrha branch detail
And the whole thing. Stippling always looks better the more reduced the image is.
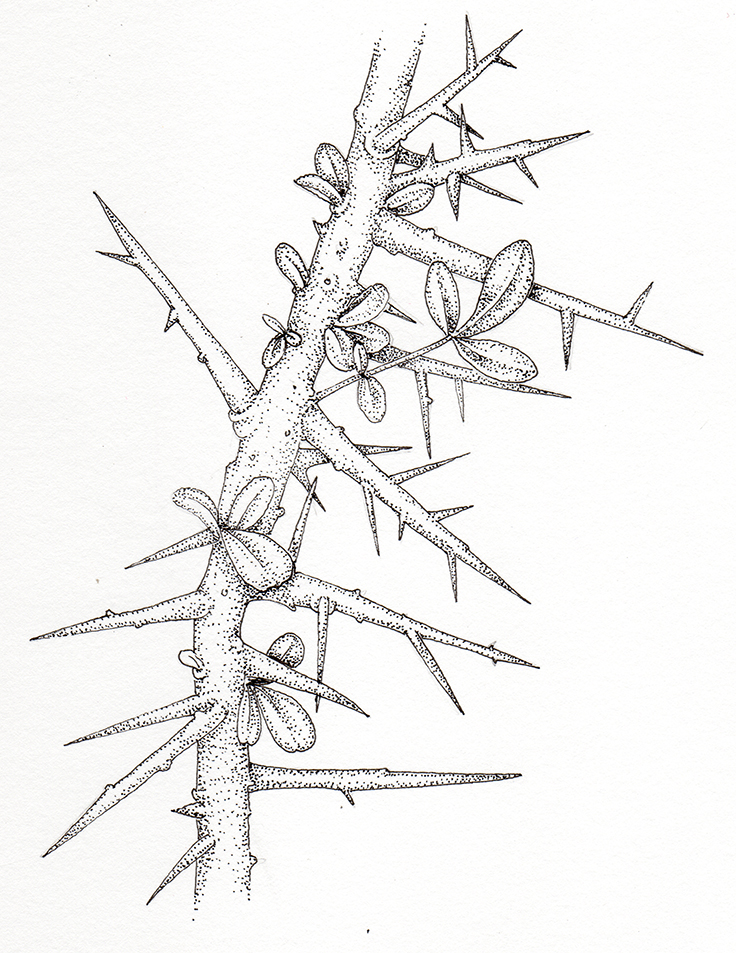
Myrrh Commiphora myrrha
Conclusion
Compared to the pen and ink illustrations of the trees, these details were very easy and profoundly satisfying. As a body of work, I’m really proud of them, and look forward to seeing them reproduced in The Living Wisdom of Trees which is due to be published February 11th 2020.
If you’d like to see a film of snippets of me stippling and working on this job in real time, (and didnt get the chance to see my earlier blog which also has the film embedded) do have a look below.
The post Pen and Ink Illustrations of Tree Details appeared first on Lizzie Harper.
